Pages

Showing posts with label vegetable plot. Show all posts

Sunday, July 29, 2012

End of July Garden Chores

Although I spent several hours working in the garden yesterday, there was still quite a bit to do today.  Here are a few of today's garden chores:
  • I turned the compost.   I do this by pulling Geoffrey's stakes out of the ground, carefully pulling  him up over the compost and moving him over a few feet.  Then I use a garden fork to scoop all the compost back into Geoffrey, only upside down, so the newer stuff goes on the bottom and the older stuff ends up at the top.  This took about an hour today, because there is a lot of compost.  The older stuff is decomposing pretty nicely, although there are a few twigs and other larger pieces that still haven't broken down.
Geoffrey, before turning
  • Transplanted a few plants that weren't doing well in their current locations.  A few weeks ago I stopped by a nursery and picked up a few plants (two bell peppers and an eggplant) that were on sale because it was really late in the season for buying transplants.  I figured they probably didn't have a great chance of survival but they were cheap so I decided to take my chances.  At that time, the zucchini and squash were mammoth so there was no room in the veggie plot for them, so I planted the peppers in pots.  One of the bell peppers was doing okay as was the eggplant, but the other bell pepper is withering away.  Since I had cleared up a lot of space in the plot by removing the zucchini plant, I decided to move the dying bell pepper to the veggie plot to see if that might save it. I turned the soil with my garden fork and added some fertilizer and manure, moved the pepper and sprayed it with some fish fertilizer.  I also moved another pepper from a pot to the other side of the veggie plot, because it wasn't growing well in the pot.
  • Planted some onions and carrots.  Since there was plenty of room around the newly transplanted pepper plant, I sewed several onion sets and carrot seeds.  So far none of the carrots I've tried to plant have come up - either they never germinated or they never grew bigger than a few centimeters.  But, I'm going to keep trying until I get it right. 
  • Harvested four hot peppers and two small onions.  My last attempt at harvesting onions produced a handful of tiny, stunted specimens, which I decided to call "red scallions."  
 

This time, I got two slightly larger onions, which gave me a bit more hope for the next set of onions I just planted.  I also planted a few more onion sets in the area where I harvested the two onions.
  • Watered the tomato pots with water from the rain barrel.  After a long dry spell, we are finally getting some rain these past couple of weeks.  So I've been able to use the water from the rain barrel quite a few times.  Since it's situated right at the end of tomorrow pot alley, I like to use it to water those pots. 
 

I've developed a system now using two alternating watering cans - I let one fill up while I'm using the other to water the pots and then I switch back and forth.  That way, I don't have to keep turning the rain barrel spigot on and off when I fill up the watering can.
 
However, only three beans have come up out of about the 12-15 seeds I planted.  I realized today when I looked more closely, that the pot was extremely water logged.  Evidently, there weren't enough holes drilled in the bottom for the water to drain properly.  When I tipped the pot over, a huge amount of water came pouring out the top and down my driveway.  I brought out my drill and drilled some more holes in the bottom (which is tricky to do with a huge pot filled with wet soil and bean seedlings that you don't want to kill).  I don't know if the seedlings will survive.  I planted a few more bean seeds for good measure, although it may be too late in the season to start beans.

Friday, July 6, 2012

Vegetable Plot Progress

I thought it was about time to show the progress of my little veggie plot.  I started preparing the plot back in early March, by marking out a 3 foot by 6 foot space on the sunniest side of my house with a spade.
 

I covered the sod with newspaper, watered it, and covered that with layers of dead leaves, compost, soil and manure.  Then I covered all that with black plastic and let it bake for several weeks.

When it began getting warm near the end of May, I decided it was time to start transplanting.  I started by planting with tomatoes (which I had been growing from seeds inside) along the back row.  In front of those, I put a variety of peppers (both hot and sweet) and some basil and parsley.  Here is how it looked after the initial planting.  There is also a pot of greens (lettuce and swiss chard) next to it, which I later moved to a shadier side of the house:

The Veggie Plot on May 23, 2012

Well my poor little veggie plot was inundated with insects, so I read everything I could find on-line and in my gardening books about how to control them organically.  As a result, I learned that interplanting marigolds, geraniums, onions, and certain herbs - such as sage and mint - can deter insects, so I did that.  I added a pot of geraniums on one side and a pot of mint on the other.

Around this time, I also planted a little zucchini plant on the front right corner of the plot:
The Veggie Plot on June 4, 2012

And a little summer squash plant on the front left corner of the plot:
Please make a note of how close the squash plant on the left front corner
is to the white geranium and the yellow marigold ...

 I had quite a few left over tomato plants, so I decided to put those in pots next to the veggie plot, along with a little pot of chives and some parsley:
Tomato plants in pots
Eventually, however, I knew the tomatoes would outgrow those small pots.  But I didn't want to spend a lot of money on large pots.  Then I came up with an idea.  These buckets cost about $2.98 at Home Depot:

Meet Homer

I had bought a couple of them previously to use for various gardening and household tasks.

So, I bought a few more:


Drilled some holes in the bottom:

Instant Tomato Pot!

I spent a weekend transplanting tomatoes into my new Homer Pots:
Tomato Pot Alley, on June 10, 2012

Here is the Veggie plot that same day - I mulched it with some dried leaves:
Veggie Plot - June 10, 2012

Hmm . . . squash plant getting a bit bigger ....

 I took a photo of my first hot peppers that day:
A green one
And a little tiny purple one - supposed to be very hot!

The tomato vines were starting to grow longer, so I started tying them to the bamboo posts with twine:

Also, on June 10, I had a little tiny harvest of greens:


Which I made into a tiny salad for dinner:
So Tiny ...
We had the salad for dinner, along with chicken stir fry made with some fresh herbs from the garden

Here is the Veggie garden, on June 13, just a few days later:


The next big events occurred on or about June 30:
OMG!!!!!  Tomatoes!!!!!

OMG!  The Veggie Plot!
It Lives!!!!!

Pretty blooms on the (now gigantic) squash plant:


The poor white geranium has no chance ....

 More hot peppers (pepper shown in previous photo has now been eaten):


And here is tomato pot row on June 30:


The following day, we had another harvest:
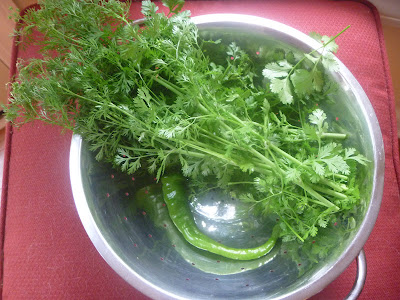
Bunch of cilantro, parsley and other herbs, and a hot pepper

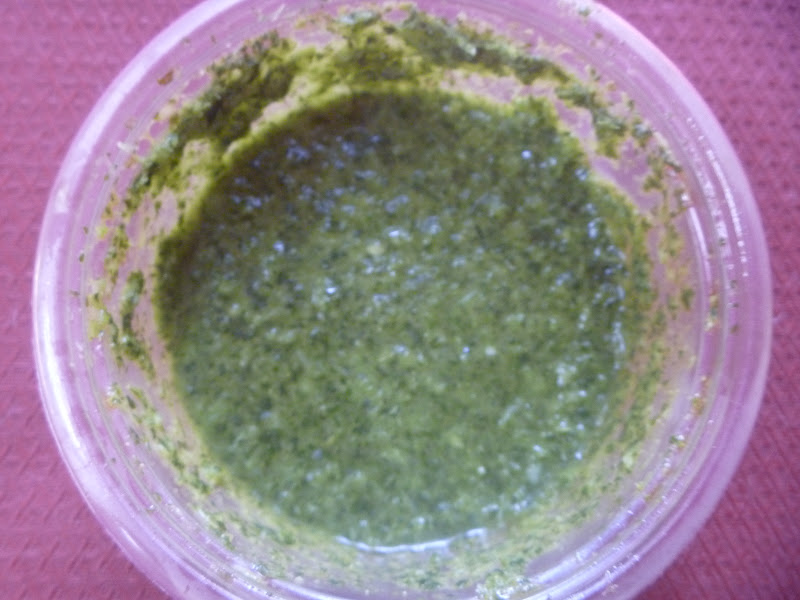
I made some scallion-cilantro sauce, which I've been using to marinate chicken:


I also made some cilantro-lime dressing, which I've used for stir fry, salad dressing, and to make some spicy cilantro scrambled eggs for breakfast this morning:


I also made some fresh salsa:


Finally, a few photos from the garden today:
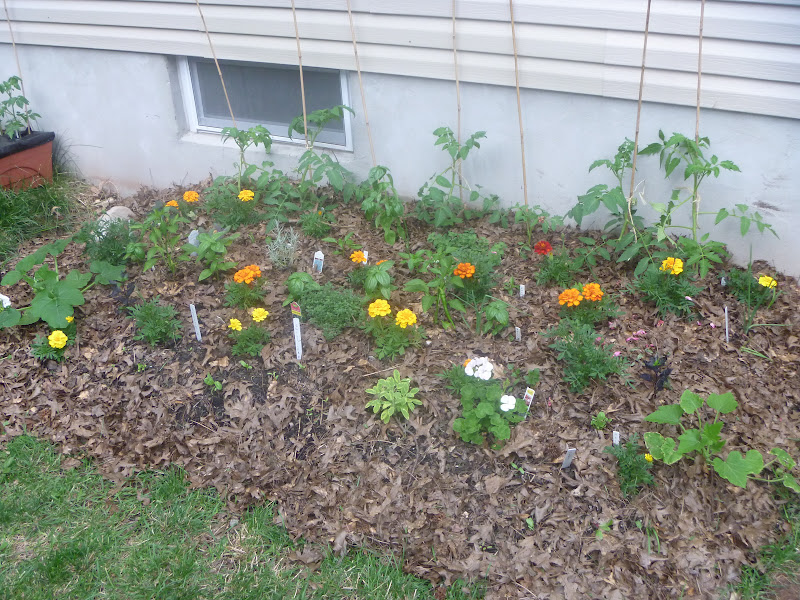
That little squash plant and that little zucchini plant have taken over,
and the tomatoes are reaching the tops of their bamboo stakes


Some beets I planted from seeds several weeks ago

Tomatoes
Close-up of squash plant

Another tiny purple pepper

More hot green peppers
I am also overrun with basil, so this weekend I will be making pesto sauce and freezing it for future use.

So, just to summarize -

Before:


And After:


Sunday, March 4, 2012

The Garden Plan (a work in progress)

The Current Plan for the Veggie Garden

I haven't made a final decision about what my veggie garden will look like.  I signed up for the free trial of the garden planner at Growveg.com and have been experimenting with different ideas.  This is my latest plan.  From left to right, top to bottom, it will have 9 bean plants, 2 cucumber, 4 different types of tomato plants, 4 parsley, 1 lavender, 2 different types of pepper, another lavender, 1 rosemary, a bunch of chives, 1 oregano, 8 basil (2 different types) and 1 sage.   Here is some more info about the plan.

The Growveg.com garden planner seems pretty useful.  It gives you a timeline of when your plants can be started indoors, planted outdoors, and harvested, based on the frost dates in your area. I have no idea how accurate it is.  I'm sure my free trial will be ending soon, so I'll have to decide whether to keep it.  No decision made at this time.  I do really like their website and blog, however.  It has a lot of helpful information.

A City Girl Tries Composting

One of the earliest decisions I made when I started my gardening research was to have a compost bin. Although I had heard of composting before, I had no real sense of what it was. I vaguely associated with ancient hippies I'd met in California or radical environmental extremists who checked out of society to go live off the land.  I'm kidding of course, but certainly no one I knew in New York City composted their waste - not even my friends in Brooklyn.  Or at least I assumed not, since I rarely left Manhattan to travel as far as Brooklyn to find out.

But, as I read about it, composting just made sense.  It made no sense to spend a bunch of time and energy raking leaves and mowing grass to dump in a landfill and then go out and spend a bunch of money to buy compost made of the same kind of stuff you just threw out.  But, frankly, I was terrified of making a mistake. How do I know what kind of compost bin to get? How do I know what to put in it? How long will it take? Will it smell? Is it legal where I live? (Apparently it is.  My county actually subsidizes compost containers to encourage composting.)  So, after MUCH research, I finally ordered the Geobin from Amazon (that is not a sponsored link, by the way).  I chose that one after watching these helpful videos comparing all different kinds of composters (credit to Dave Wilson for posting these on YouTube): 

 
 Testing Home Compost Units: Intro

 
Part 2

Part 3 - the Results!


Geoffrey the Geobin arrived a few weeks ago and sat patiently in my garage where I would nervously glance at him on my way to and from the car.  Finally, yesterday, I could avoid it no longer.  I finally fastened Geoffrey's edges together to form a huge circular container and hammered the stakes into the ground behind my house (just around the corner from my new veggie bed).  I then spent two hours raking up old, damp leaves that had been covering my backyard all winter (see my mea culpa here).  I threw in a few kitchen scraps I'd been saving and, voila! My new compost bin:


A close-up shot of Geoffrey:


I should note that almost everyone recommends that leaves be "shredded" before composting.  At this point, I do not own anything capable of shredding leaves (I'm sure my lovely boyfriend would not appreciate me running our dead, slightly rotting leaves through his paper shredder).  So, I realize this material will probably take a lot longer to decompose than if I had shredded it.  That's okay.  I will be patient.  Meanwhile, I guess I will be buying any compost I need this season from the garden store.  Sigh.

My First Tentative Step

After months of research, I took my first cautious step into the garden a couple of weeks ago.  I decided to start my new veggie garden bed.  After much consideration, I picked a location on the south side of my house. It seems to get the longest sun exposure throughout the day, although the sun only hits a narrow sliver because of the shade caused by the neighbor's house.

The site of my new (very narrow) veggie garden.  Note the offending shadow from my neighbor's house.
I decided to use a method called "lasagna" gardening, where you cover the area with a layer of wet newspaper and build layers of compost material and soil to form a raised bed.  First, I measured out the space (6 ft by 3 ft) and marked it by sprinkling some flour around it.  Then, I dug a trench around the edges, layered the whole thing with newspapers, soaked it with the garden hose and covered the planting area with old leaves (which I had never bothered to rake up from my back yard the previous fall).  Yes, I'm a terrible neighbor, but keep in mind I had just moved into the new house and I was completely ignorant about suburban etiquette, like it's considered rude not to rake your yard.  All of my neighbors were very nice and said nothing about my offense, probably because I'm new to the neighborhood and home ownership.

The veggie bed in progress

Then I continued to layer and water, layer and water.  Finally I topped it off with some soil and black plastic garbage bags, weighed down by the numerous rocks and stones I had just dug out of the very dense, clay soil surrounding my new veggie bed.  By the way, this discovery convinced me that I made the right decision to create a raised bed, rather than trying to double dig the soil in my yard. Oy!

The new veggie bed, after several layers, but before covering with black garbage bags.
As the compost materials decompose, the bed will lose some height, so I plan to add some bags of soil today (purchased from Home Depot yesterday).  I also bought a bag of fertilizer, but haven't completely decided whether to add it to the veggie bed yet.  There seems to be some difference of opinion about whether to add fertilizer or not.  I also haven't decided whether to add some edging to the bed, such as bricks or cinder blocks.  I will put the question out into the universe and see what comes back.